The My Company Tabs are where you set all options and preferences for your company (i.e.; how you choose to configure the software, team members, contact information, how your company appears to others and communication preferences. These are all set by you in the My Company tabs.
If you’re a new user be sure to fill out your company profile, and your own team member profile. You may also designate a company or name and email address for all automated notifications that send to clients and affiliates from your account.
All the settings that define your company and your use of the software are within these My Company tabs. No features are hidden. Take time to go through all the tabs to make all the choices. They are all controlled by you.
Add or Edit Team Members
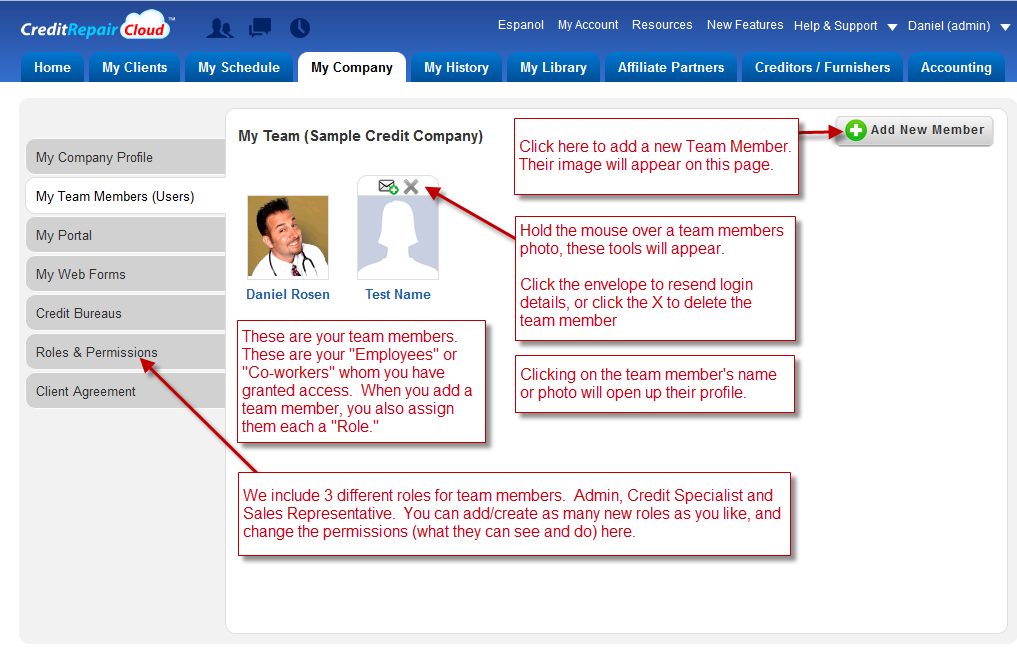
Team Members are employees (or partners) in your company, whom you have assigned creditrepaircloud.com login privileges. We include 3 different roles for team members. Admin, Credit Specialist and Sales Representative. You can also add/create as many new roles (titles) as you like, and change the permissions (what they can see and do) by clicking on “Roles and Permissions.”
You can change the name and email addresses of your team members any time you like (with the exception of the Account Owner’s name and email).
*Security note: During signup, an account owner agrees with signature that they; are solely responsible for the account, the account-owner’s name and email cannot change, accounts are non-transferrable and client and company data cannot be moved from one account to another. All support communications must come from the account owner using the same name and email address that you signed up with. We cannot give client or account information to a 3rd party who is not the account holder. No exceptions. Your bank won’t discuss your account with a 3rd party. Neither will we. Please respect our guidelines for security.
This picture shows how to add or remove Team Members (Click to Zoom)
Assigning Roles and Permissions
In the “My Company Profile” under “Roles and Permissions” we inclued 3 default roles “ADMIN,” “Credit Specialist” and “Sales Representative.” Each role has a pre-defined set of permissions. Each time you add a team member, you assign one of these roles to them.
The pre-defined list of permissions cannot be changed for the 3 default roles, however, if you want to assign a different set of permissions, all you need to do is create a new “Role.” Once you have created that new “Role” you can add any set of permissions you like.
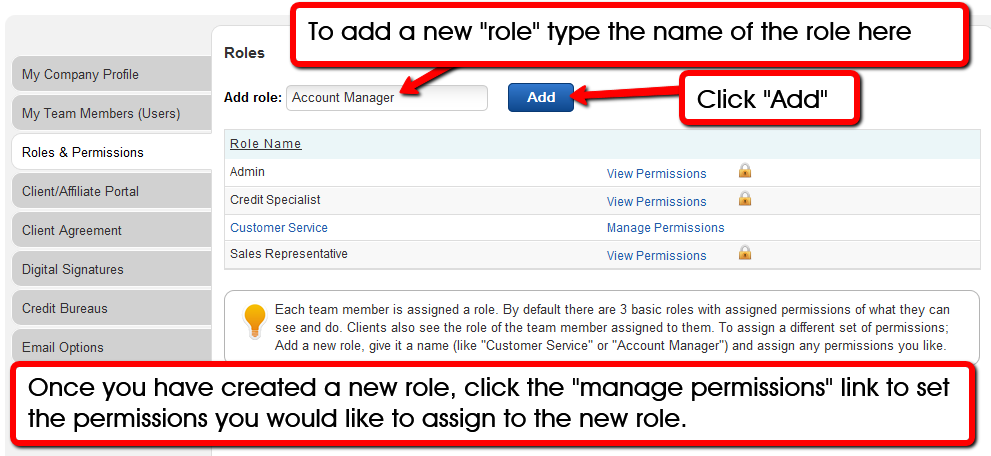
Here’s how
- Add a new “role,” give it a name, like “Customer Service” or “Account Manager”.
- Click “Manage Permissions” to assign the set of permissions for that role.
Now you can open up any team member profile(s) and assign them this new role.
Here below is a screenshot (Click to zoom):
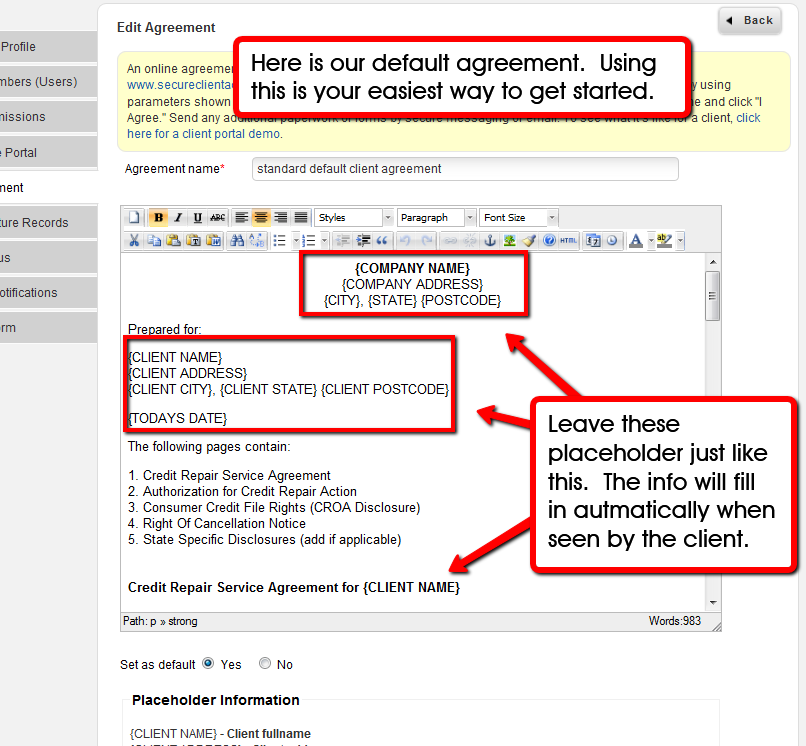
Creating your default agreement
You can add any online client agreement to your Client and affiliate Portal at www.secureclientaccess.com
Some users prefer an online agreement, others prefer to send the docs (or have the client sign in person). This is up to your preference.
We provide an online client agreement that you can modify. Or you may want one of your own. There is no user interaction or data automation/population involved in the agreement. It’s simply an online agreement that a new client must see and click “I agree” to the very first time they arrive in your client portal. After they click “I agree” they never see this agreement again on any future visit. As a result of their entering Name, Email Address and Clicking “I agree” you will now have a nice saved record showing the clients name, email, IP address and timestamp of when they clicked “I agree”. A digital signature is a valid agreement , but you certainly may want to have a written signature as well. Here’s info at the FTC Website about digital signatures:
Note: At the time of this writing we are working with Adobe Echo to provide integration with their service for real signatures. As soon as that modulke is ready, it will be offered as an add on for people who subscribe to Adobe Echo Sign. We have no new about their pricing. We will announce this when integratuion has been completed. In the meantime, we suggest sending a seperate agreement and signature: in person, by mail or by PDF (if your client is tech savvy) or you may be fine with just the online agreement with digital signature, timestamp and IP. Again these are up to your own business preferences.
If you choose to have an online agreement, this is how it works:
- First, you must edit, save and set your default agreement.
- Click on MY COMPANY – CLIENT AGREEMENT
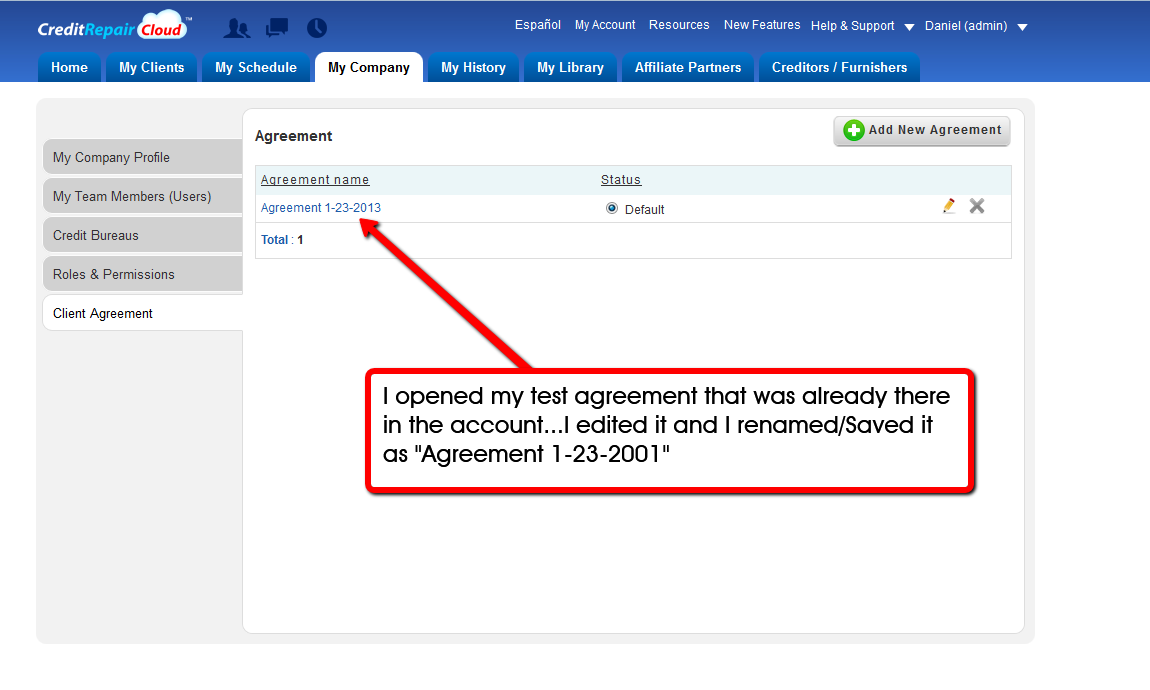
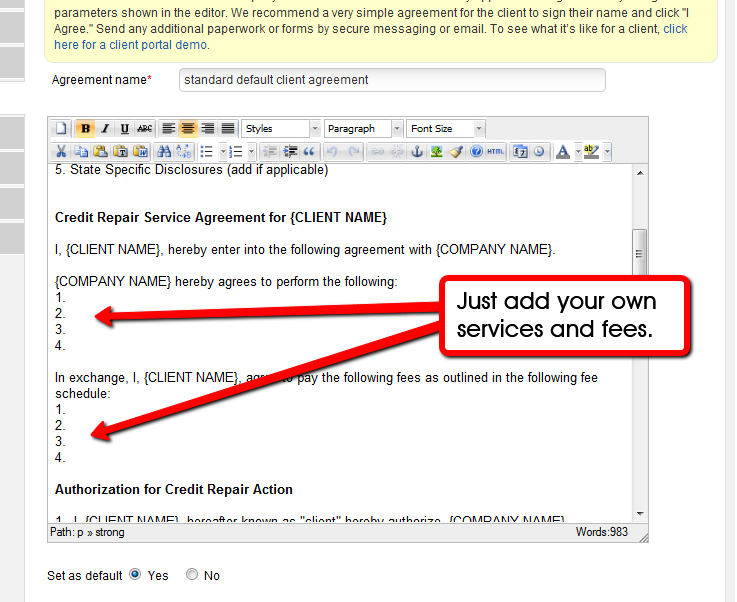
- Choose “Add New Agreement” or Edit the TEST AGREEMENT by clicking the little pencil icon. Below i this example I chose Edit the TEST AGREEMENT
Make any changes you like. Now rename it something unique like “Agreement 1-23-2013” choose “SET AS DEFAULT/YES” and click SUBMIT
(Click to zoom on this image).
The easiest and fastest solution is to just add your information to the existing default agreement,
Client Login options for your website
When your clients profile is created and you’ve turned portal access ON and sent login details, your clients are sent a letter with Portal Login Details. Some users want additional options for clients and affiliates to log in directly from their website.
Here are 2 new options of things you can add to your website.
1) Some users just want a simple and clean login button on their site that links to https://www.secureclientaccess.com like this…
![]()
2) Other users want their clients to log in to the portal from a login box on their company website. If that’s what you were wishing for, today is your lucky day. Visit “My Company>Client/Affiliate Portal>Login Options” and copy the “Portal Login Box” code. Then when you paste it into the html of your webpage it will look like this:
Want to try it out? Try this user ID and password: Client / Demo
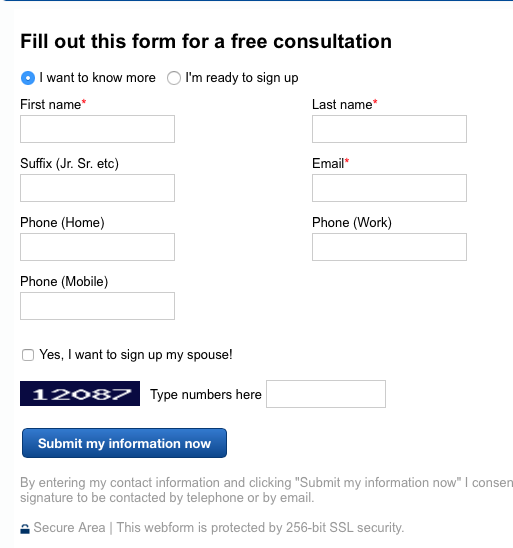
Web Lead Form (capture leads from your web site)
Visit MY COMPANY>WEB SITE TOOLS to copy the code necessary to create a Web Lead Form on your web site. When a visitor to your site fills out this form, it will import to your Credit Repair Cloud Account as a new “Lead.”
If you’re a ChargeBee user and want your ChargeBee plans to appear in the web lead form, go for it! That’s your choice.
To add a web lead form to your site:
Simply copy and paste the code into an html page in your website or send the code to your IT person or web designer. Or, if you use our web hosting and our sitebuilder tools, you can drag the Script module into your web page, paste the code and publish your site. Here’s a video to show you:
Here’s what the web lead form will look like on your published site:
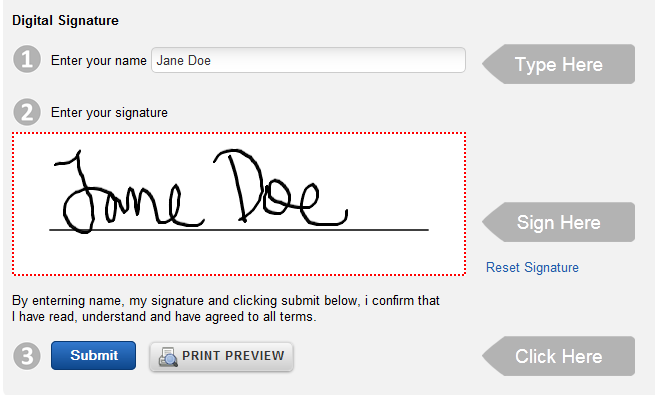
Signature Capture for your Online Agreement
The first time your clients log into your portal, they must sign and agree to your default client agreement. Clients add their real signature. These save with timestamp and IP in your company profile (under “Digital Signatures”).
Try it yourself:
- Click here to see a page about the client portal.
- Click the blue button that says “Login to Client Demo”.
- Once you’re in the client portal demo, scroll down and try the digital signature.
(Click to zoom)
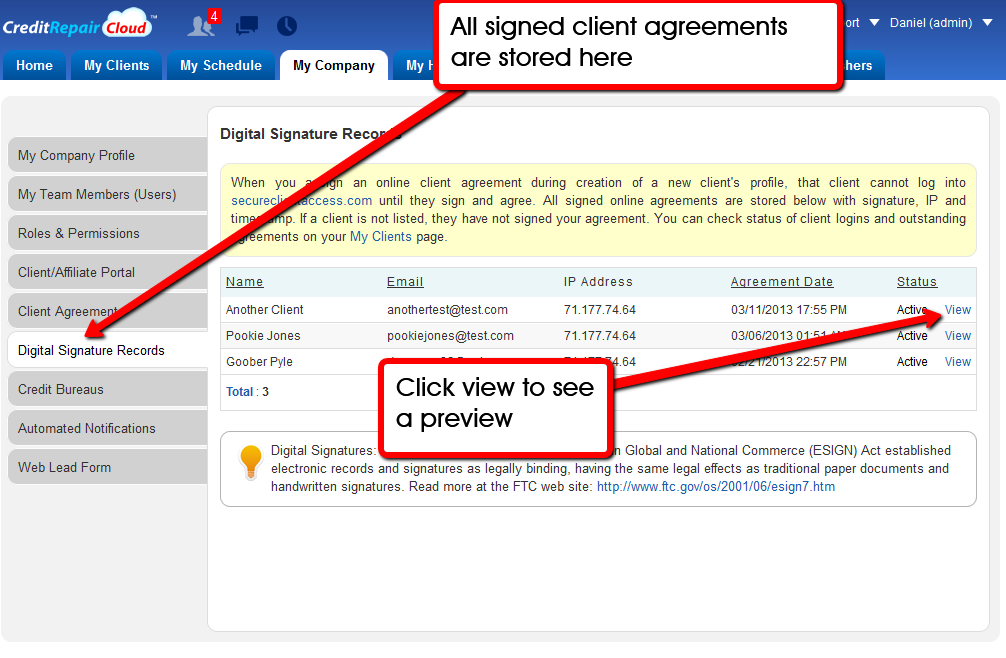
View your signed client agreements
Once a client has logged in and signed your online agreement, you will see a record of this in 2 places:
1) In your client list, this green checkmark shows that your client has logged into your portal and signed your online agreement. Hold the mouse over the checkmark for time stamped details. Click the link to see the signed agreement.

To see all stored and signed client agreements, click on MY COMPANY — DIGITAL SIGNATURE RECORDS and click VIEW to preview any record in the list.
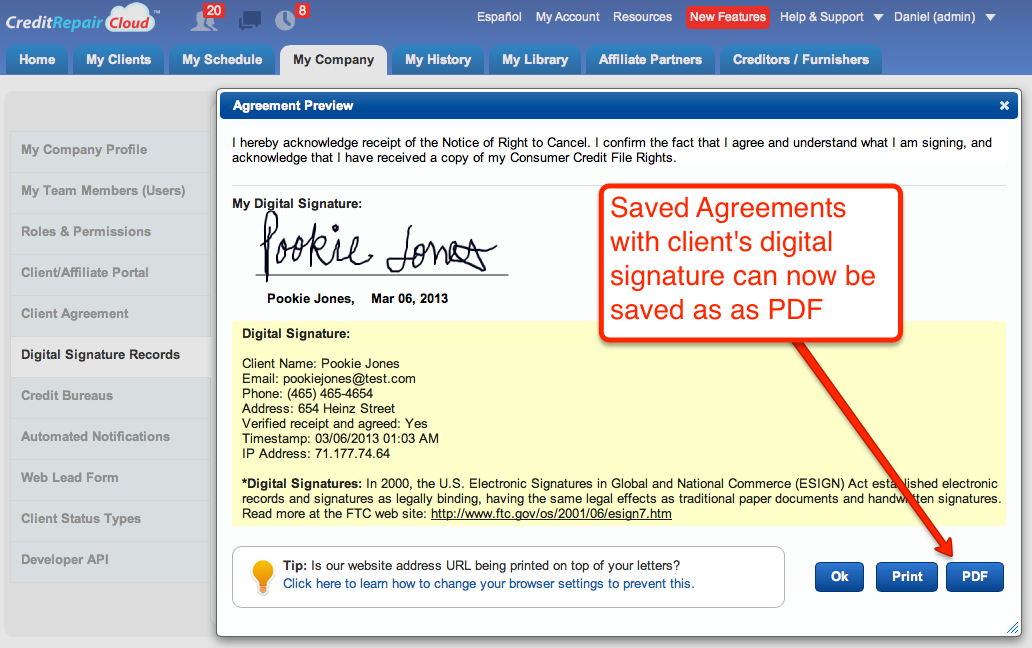
Online Agreements with Client’s Digital Signatures can now be exported as PDF
This was a user suggestion posted by Mark in our our UserVoice “New Feature Request” page. Thank you Mark! Access this feature in ”My Company > Digital Signatures.” The PDF button is next to the print button.
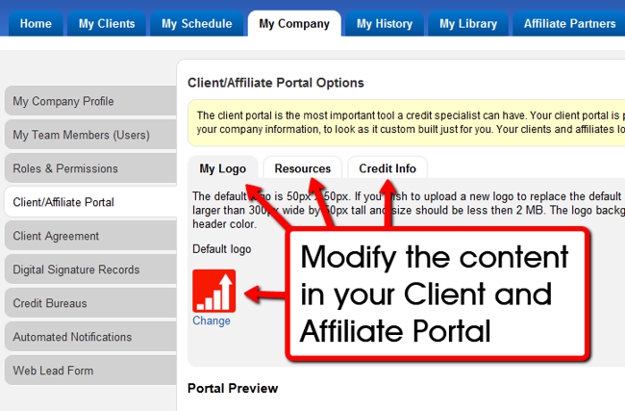
Modify your Client Portal
The client portal is the most important tool a credit specialist can have.
Your client portal is private label, displaying only your logo and your company information, to look as it custom built just for you. Your clients and affiliates log in at https://www.secureclientaccess.com. If you are an ADMIN, click on MY COMPANY — CLIENT/AFFILIATE PORTAL OPTIONS and click on these 3 tabs to modify the logo and content of your client and affiliate portal.
Change the logo in your client portal
The default logo is 50px x 50px. If you wish to upload a new logo to replace the default logo, it must be a jpeg, jpg, png or gif, no larger than 300px wide by 50px tall and size should be less then 2 MB. The logo background should be transparent or match the header color.
Edit/Modify the Resources and Credit Info in your Client Portal
Your client and affiliate portal comes preloaded 2 pages of useful links and credit information. If you would like to change or edit these pages to add your own text or links, (and if you are an ADMIN), click on MY COMPANY — CLIENT/AFFILIATE PORTAL OPTIONS and click on these 3 tabs to edit the content.
Affiliates and Clients can now update their own contact details
Affiliates and Clients can now update their own contact information directly from their own affiliate portal login.
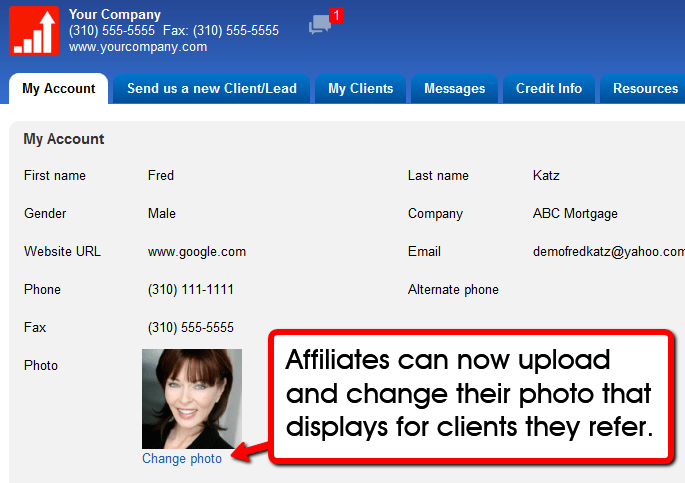
Affiliates can upload or change their own photos
Affiliates can now log into their client portal and upload or modify their own photo or logo.
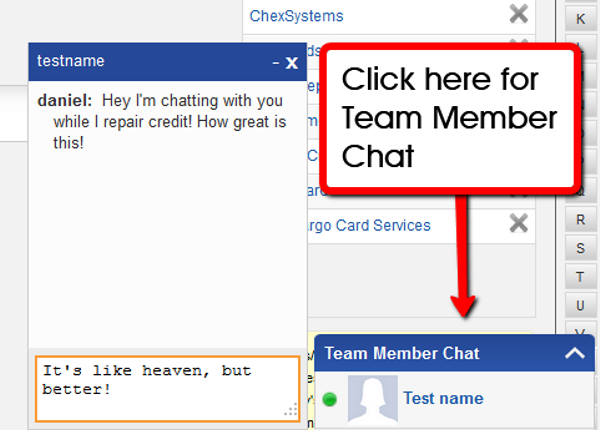
Team Member Chat
If you work virtually of have co workers in other locations, you will find the team member chat feature a very handy way to communicate with each other from within Credit Repair Cloud
Down in the bottom right corner of your screen you will see Team member Chat. To start using it, just click on “Team Member Chat” and then click on the team member’s name that you would like to chat with. Then start typing.
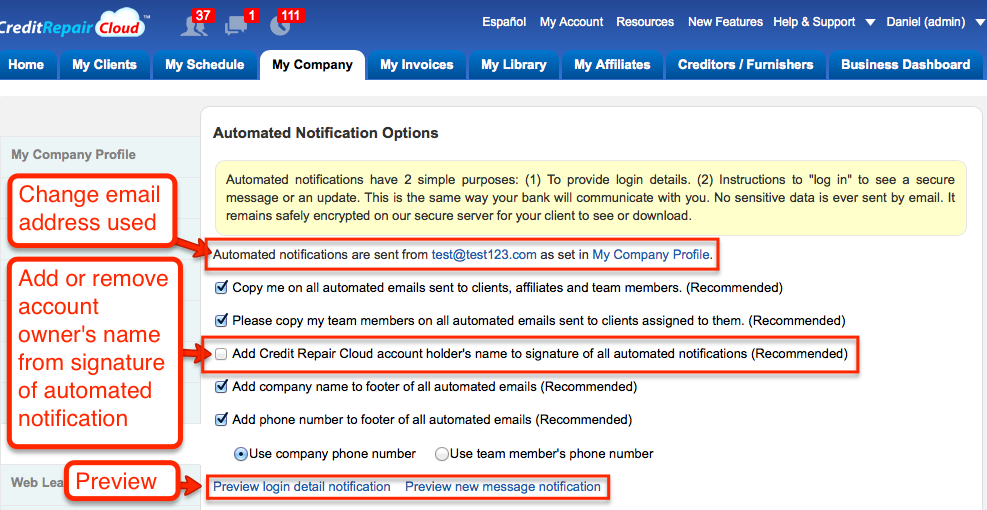
Automated Notifications Options
Change the master name and email for automated notifications sent from your company account
This is one of the most-requested features we’ve ever had! By default, the account holder’s name and email address are used for automated notifications, such as login details, updates, etc. You can now assign a master name and email for all notifications sent from your company account. It can be a person’s name, a company name, a department name, whatever you choose to type into the field. Please be sure it’s a working email address. See “My Company > Automated Notifications.”

Add or Remove Account Owner’s name from Automated Notifications
Automated notifications are sent from the email address designated on the “My Company” page. Some business owners want their name in the signature and others don’t. These new options on the “My Company>Automated Notifications” page make this easier to manage and preview:
Add company name and phone to the footer of Automated Notifications
We have added new options to add your company name and phone number to all automated notifications sent to clients and affiliates. You will find these new options in MY COMPANY — AUTOMATED NOTIFICATIONS.

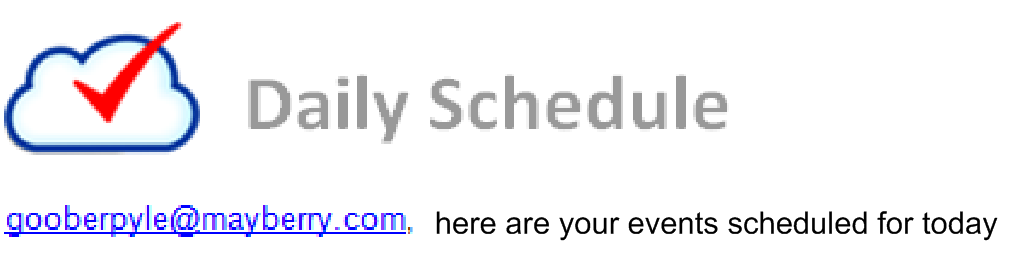
Daily Agenda/Schedule (morning email)
Receive your daily schedule of events each morning by email.
If you’ve opted to receive Daily Agenda notifications (for reminders and and appointments in your Credit Repair Cloud), they’ll be sent out via email at approximately 5 AM, local time. To receive these agenda emails each morning, with your daily schedule, follow the steps below.
To turn Daily Agenda emails on/off, follow these steps:
- Log in to your Credit Repair Cloud account
- Click on My Company
- Click on Automated Notifications
- Check or uncheck send daily agenda (recommended)
Custom Client Statuses
New or Custom Status Types for clients
We have added additional client status types such as “Suspended” or add custom status types of your own. Change a client’s status in their client’s profile. We will be adding more functionality to this and the API in the coming weeks. See My Company > Client Status Types for details.

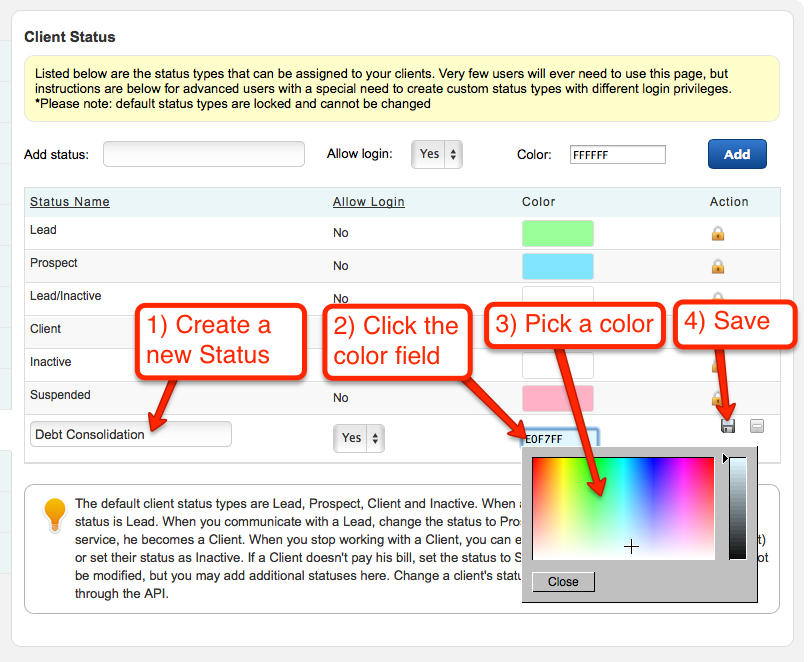
Add Colors to Custom Client Statuses
A few months ago we added the ability to set your own custom statuses to clients. Now add colors to those custom statuses so they will stand out in your client list. Visit “My Company> Client Status Types.” To add a color highlight to any “Custom” status you’re created: Click and choose the color and then click the save icon.