This tool will import online reports from these 6 providers:
|
Disclaimer: We are not a provider of credit reports and we are not affiliated with any credit report providers. How you handle reports is between you and your client.
Most of these services listed above have a free trial that includes 3 reports and scores for $1. Your client should order their reports directly with the Credit Report providers. Most users have their client sign up and provide login details for the report. Once you’ve imported a credit report for a client, You do not need to import a credit report again for that same client. Update items later in the “Dispute Items Page.” Visit that page for a video.
Steps to import the FRAME SOURCE of the Report
- You must use Google Chrome and install a Chrome extension called “Allow Right Click” http://goo.gl/ak2rK
- Visit the provider and open the report in Chrome
- When you’re in the report be sure to choose “View Full Report“
- Do a right mouse click in the middle of the report
- Choose “VIEW FRAME SOURCE” (NOT “PAGE SOURCE”)
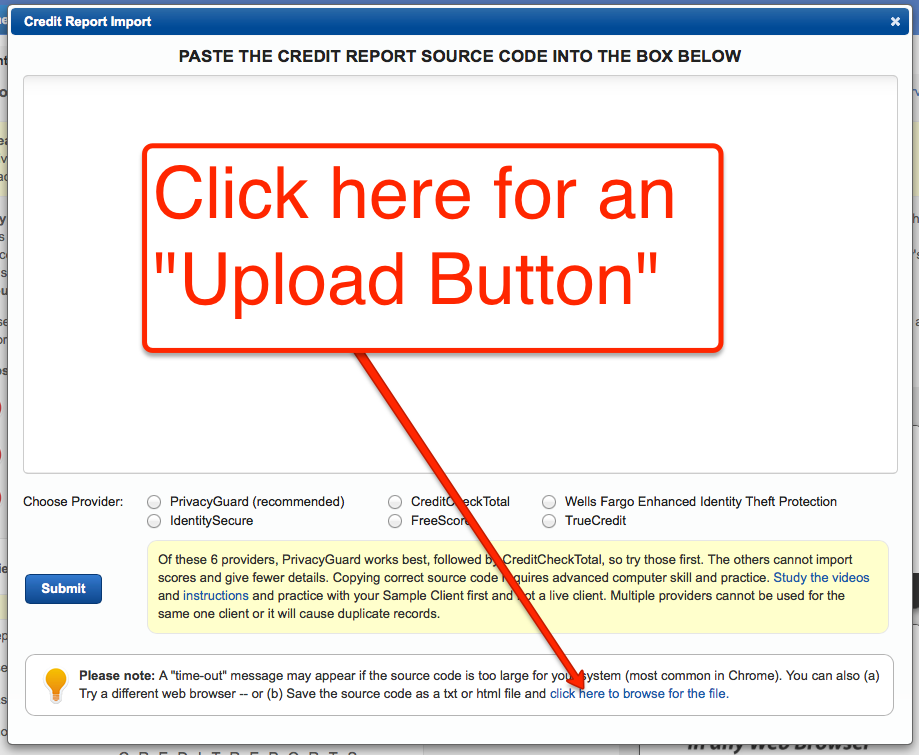
- Click and highlight all the source code, Copy as usual and paste into the Import page in Credit Repair Cloud.
Works perfectly! Here’s a video!
.
_________________________________
Steps are:
- Client (or you, on behalf of your client) will sign up for a free trial and access a 3 bureau credit report and scores.
- Copy the code from the page and paste it into Credit Repair Cloud. All the data will import from all 3 bureaus (no more typing!)
- The negative items will be flagged and saved as dispute items for the letter wizard.
The first 3 bureau report (and scores) are free. If your client decides to keep the “credit monitoring” service with that company, they will be charged $12-15 per month until they cancel that service. We have no relation whatsoever to the credit monitoring services, so remember to cancel if you don’t want the service. They each have a free (or $1) trial. To access your 3 bureau report and scores immediately. To use this Credit Report Import feature you will need to use one of the services that are supported. Credit reports come from hundreds of providers in many formats. We are not adding additional providers at this time.
Learn with your SAMPLE CLIENT and SAMPLE CREDIT REPORT
Sample Credit Report Source Code (for practicing and learning)
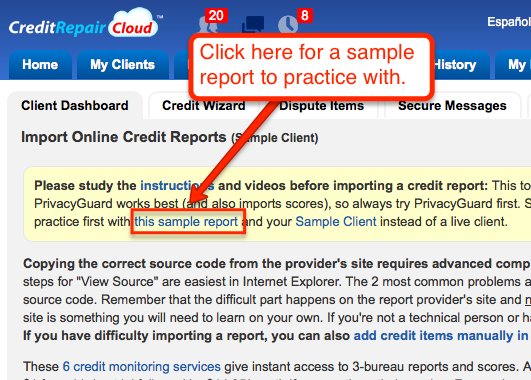
We’ve added a sample “John Doe” Credit Report for practicing and learning how to import an online credit report. First: create a test client named “John Doe.” Then visit his dashboard and click the button that says “Import Online Credit Reports.” You’ll see a link at the top for the sample Credit Report Source Code.
Here’s a picture of it:
Viewing and Updating Items you’ve imported
Dispute Items list now has option of “Credit Report View”
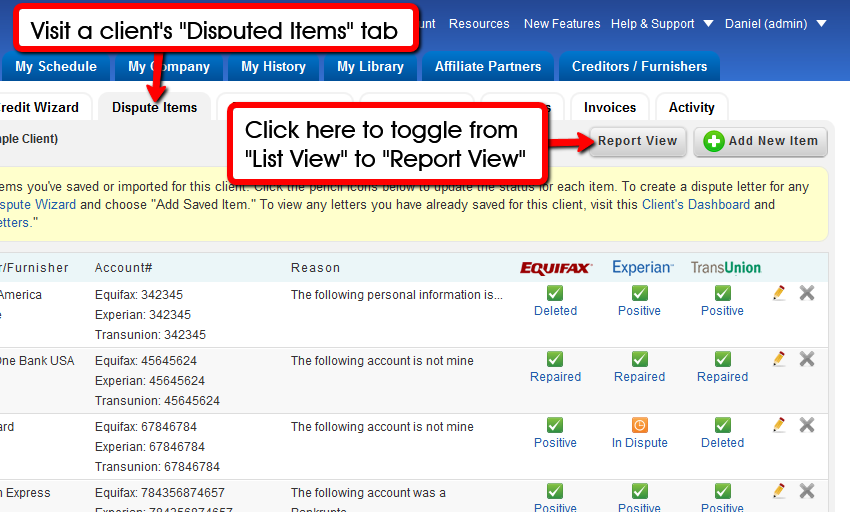
Once you’ve added or imported items from a Credit Report, you can see those items (and update their status) at that client’s “Dispute Items” tab. On that same “Dispute Items” page, we have now added a new “Report View” which shows these items in Credit Report format. In the “Report View” you can click to update status, reason or instruction for any dispute item.
To see the new “Report View,” visit any Client Dashboard, click the “Dispute Items” tab to see that you can now toggle between “List View” and “Report View.” Items imported from a credit report (or manually) will display in a Credit Report format.
Save an Imported Report as “Pending” and finish later
Save an Imported Credit Report as “Pending” and finish your work later
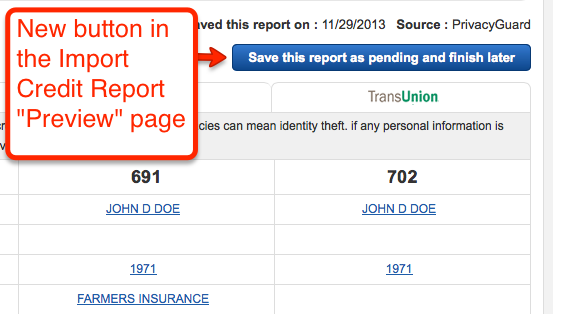
Many people have requested this one. When you import an online credit report it first appears in the “Preview Credit Report” Page, where you must tag and save the negative items. We’ve now added an optional button to save the report as “Pending.” You can come back later to finish tagging the dispute items for the wizard. The credit items will not populate to the rest of the software (and the Wizard) until you return to finish your work.
Here’s how to use this optional new feature in the Import Credit Report Preview Page:
1) Click the new button that says “Save this report as pending and finish later (optional).”
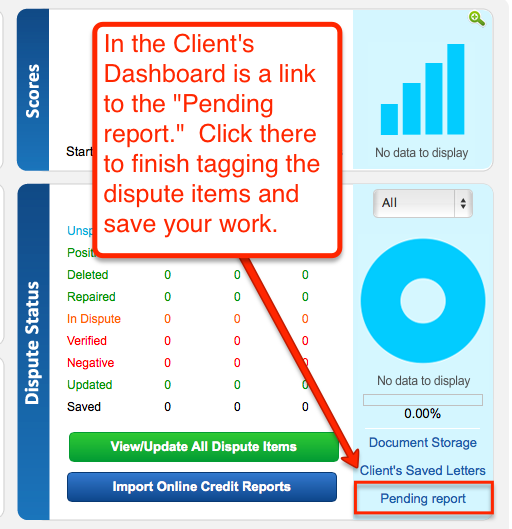
2) Return to the “Pending report” to finish your work by clicking this link in the client’s dashboard.
Using the “Client’s Choice” module (advanced)
“Client’s Choice” is a feature some of our bigger users (with thousands of clients) have been requesting. The idea is simple:
- Import a credit report for your client
- Your client receives a notification to log in and make choices.
- The client logs into the portal and chooses the items to dispute.
“Client’s Choice” is optional and not for everyone because it adds extra steps for clients. Only activate “Client’s Choice” if you understand it and feel it’s necessary for your workflow. Activate Clients Choice globally in My Company>Client/Affiliate Portal>Client’s Choice.
When you turn on Client’s Choice, you are turning it on globally for all new clients whose credit reports you import. Reports can be “imported” and there is also a “manual” option (in the event where there is an issue preventing you from importing that client’s credit report). See the video below.
*NOTE: Unless you have thousands of clients, you probably won’t want “Client’s Choice.”
*Want to scale to thousands of clients? Read our recipe to scale.
.

