You will receive leads and clients from several sources.
- From a web form on your site that sends you new leads
- From an affiliate who logs into his portal and sends you leads
- Or by manually entering the clients data.
Adding Clients

Importing a client list from any other software or database
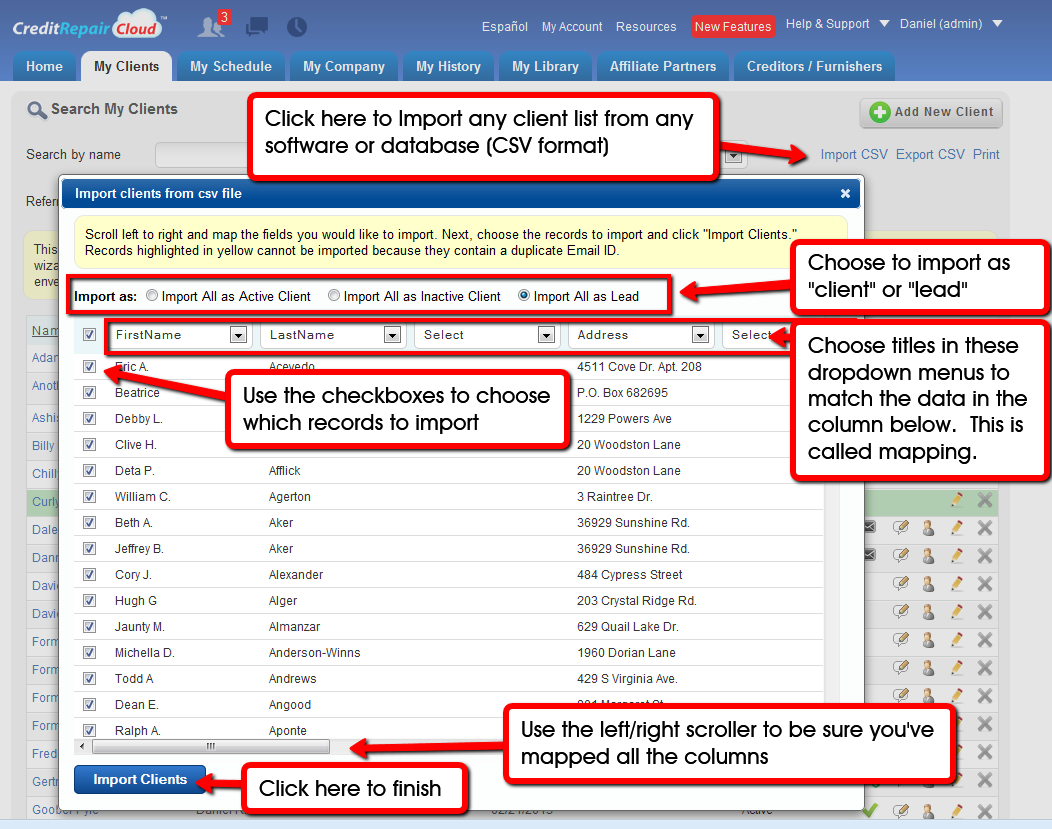
Import Leads or Clients from any other Software or Database
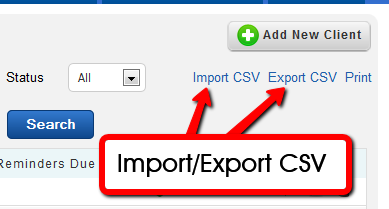
Have a database (or list) of leads, or a CSV client list that you’ve exported from some other software? Visit your Client Page and use the new Import CSV tool. Follow the onscreen instructions to map the fields and choose the records to import.
Activating your your default agreement for new clients
Some companies like an online agreement? Others prefer paper or pdfs. This is all entirely up to you. Here is how to use your online agreement for a new client:
Once you have edited, saved and set your default agreement in your Company Profile as described here in section 4 “Creating your default agreement” you are ready to start using your default agreement with new clients.
Here’s how:
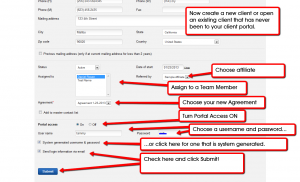
- Now Click on MY CLIENTS – ADD NEW CLIENT
- Fill in all fields
- At the AGREEMENT, choose your new agreement
- At PORTAL ACCESS: Turn it ON
- Choose username and password.
Here is a picture showing the fields to enter (click to zoom)
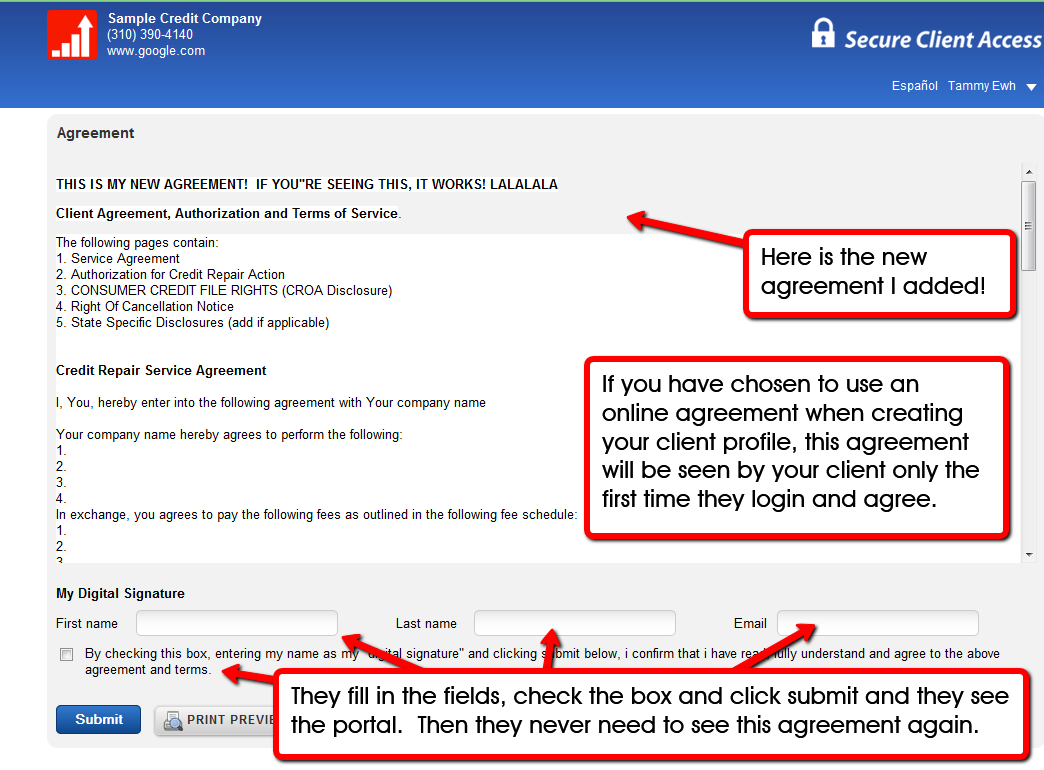
Now when your client logs in at www.secureclientaccess.com, this is what they will see on their first login (click to zoom):
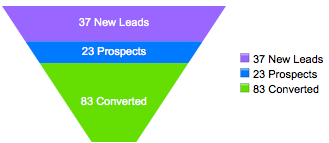
Working with Leads
New lead notifications
New leads are displayed at the top of every page. Click to see the leads.

Now the “Lead” appears. You can click the “Lead’s” name to see details or click “Add Client” to convert the “Lead” to a “Client” and start working with that client.

Following up on Leads and Prospects
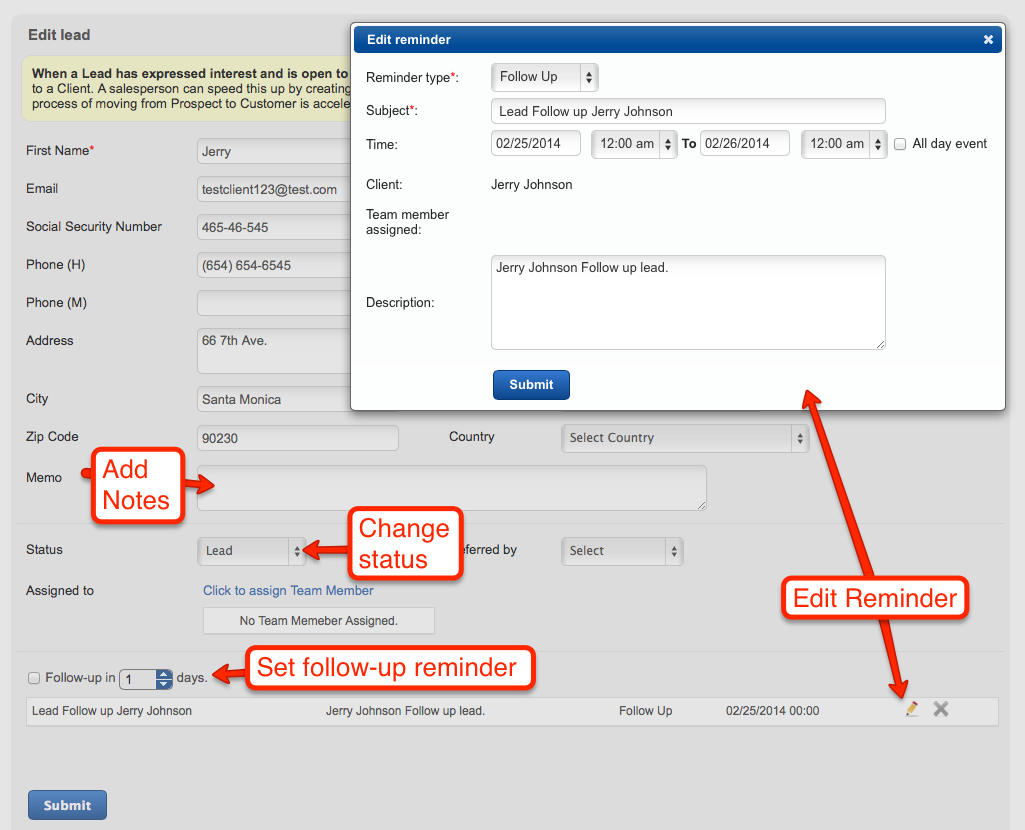
CRM Sales Tools in New Lead Profiles
Productivity tools in new Leads profiles help your Sales Team move potential clients through your sales funnel. When a Lead has expressed interest and is open to further contact, change their status to Prospect. It may take multiple contacts to convert a Prospect to a Client. A salesperson can speed this up by creating a sense of urgency. When a Prospect perceives a real and immediate need for the services offered, the process of moving from Prospect to Customer is accelerated. Add notes, change status, set follow-up reminders and more. Reminders appear in your daily notifications and schedule. Today’s agenda can be emailed to you each morning if enabled in “My Company>Automated Notification Options.”
CRM Sales Tools in Leads (Click to Zoom)
Your Client List
Client List
Clicking on the client tab will display your client list.

CSV Import/Export
Import/Export of CSV is a very useful tool, especially if you are transfering clients over from Credit-Aid version 9 or version 9. This tool will import all of your clients. It’s also handy for exporting your client list for use in other programs, such as Quickbooks. This tool is located in the client page on the top right.
Billing and Invoicing
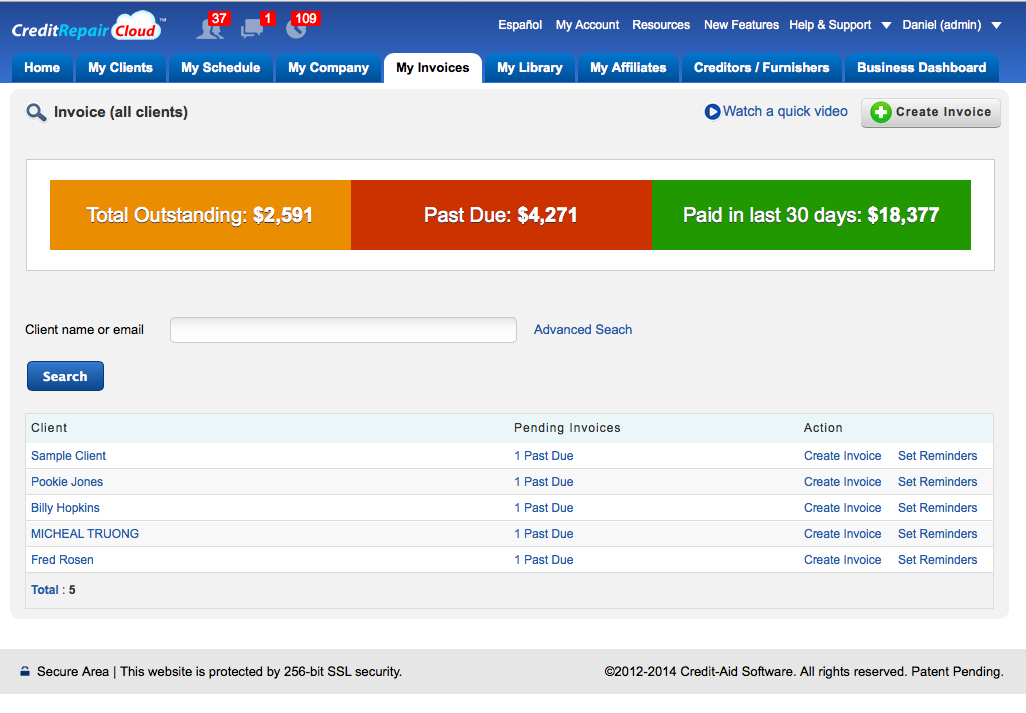
The “My Invoices” tab
This was one of our most requested features on our UserVoice page. At log in, you’ll see a new tab for My Invoices with a financial overview for all clients. If you’re an ADMIN you’ll see status of All Clients, but if you’re not an ADMIN (or if don’t have appropriate permissions), you’ll only see clients assigned to you. Invoice data syncs with the new Business Dashboard, giving you a 360 degree view and powerful tools (KPI’s) to scale a business. It’s very intuitive and it runs much like Quickbooks. If you were using the old simple invoicing module don’t worry, your old data and old features are still there! We’ve just added more.
Here’s a screenshot with more details below:
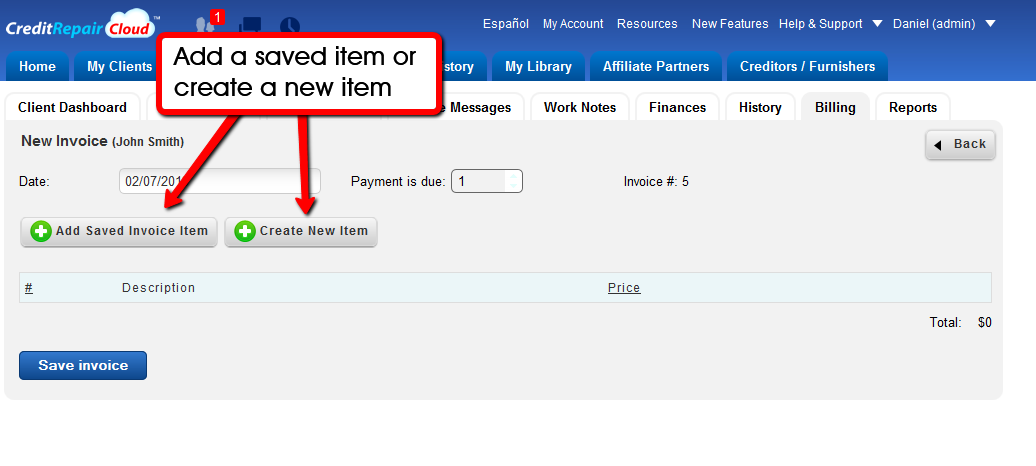
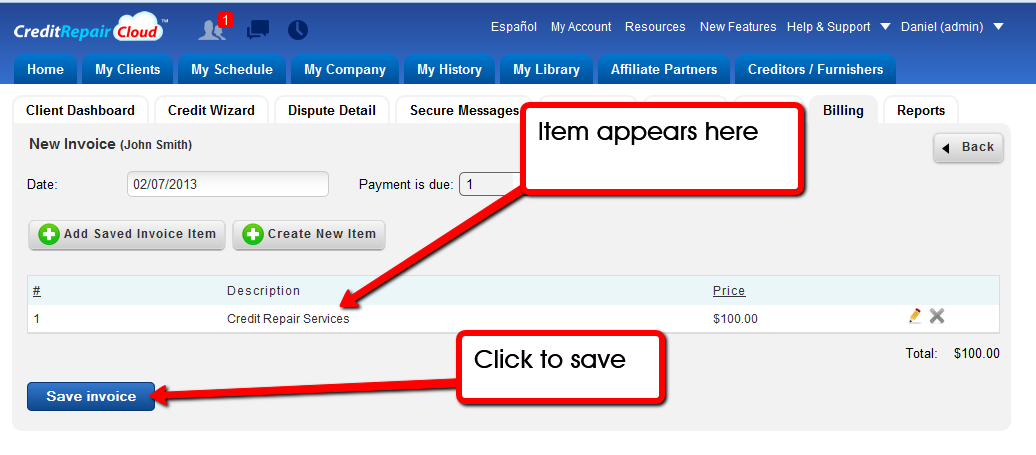
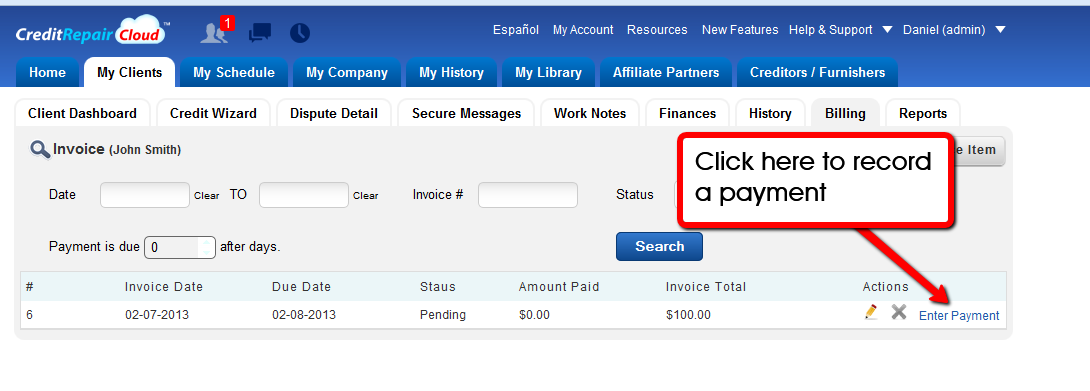
If you used the old invoicing module, all your saved invoices are still there. If you saved invoice items with fixed prices, those are still there, too. Just click the buttons to add them when you’re creating a new invoice. You can also enter payments on outstanding invoices same as before.
Here’s what’s new on the MY INVOICES tab:
- If you are an ADMIN and you log in and click MY INVOICES you will see status of ALL Clients
- You can filter by OUTSTANDING, PAST DUE and PAID by clicking on the colored headers.
- If you’re a team member who is NOT an Admin, you will only see stays of clients assigned to you.
- You can still access invoices (same as before) from within any client’s dashboard or account.
- The invoicing feeds data to the Business Dashboard (seen only by Admins) which gives you KPI’s to scale a business.
For any new feature: always practice first with your Sample Client. Never on a live client. If you spend 5 or 10 minutes creating invoices for your Sample Client, then you will know your way around. It’s very intuitive. If you use QuickBooks you’ll feel right at home.
If you’re NEW to Credit Repair Cloud or want extra 1-on-one help in; setting up your account, learning to import credit reports, set online agreements, creating invoices, setting up a website, etc, you may want to consider a 1-on-1 Software Training with Keenan. Schedule it here: https://creditaid.acuityscheduling.com
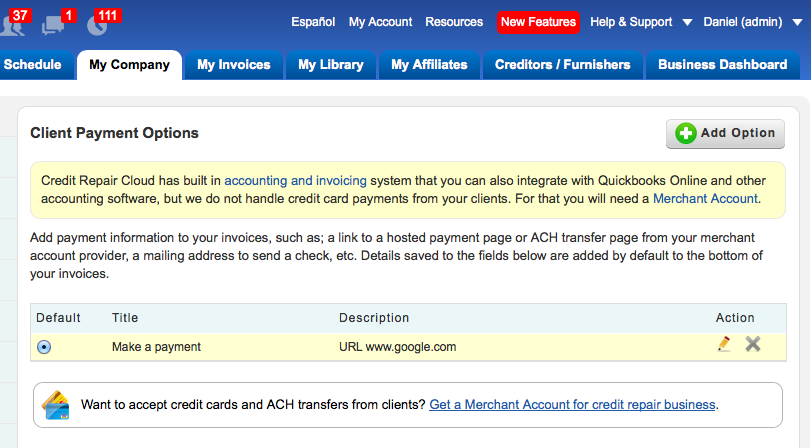
Client Payment Options for Invoices
Credit Repair Cloud has built-in accounting and invoicing but it’s important to remember that we are not a payment processor. To take credit card payments or ACH transfers from clients you need a Merchant Account for Credit Repair. If you have a hosted payment page from your Merchant Account or Payment Gateway, you can add a default link to your invoices in your “My Company>Client Payment Options” page.
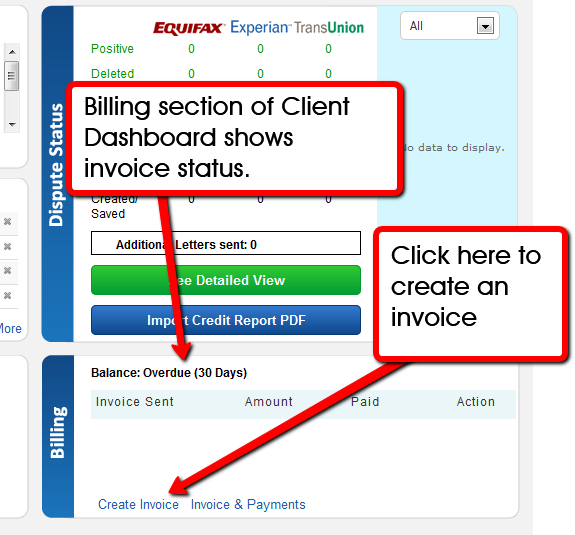
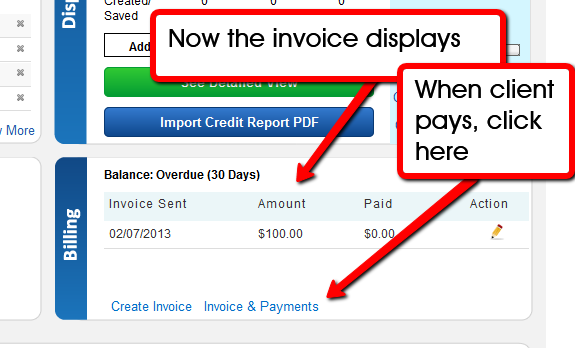
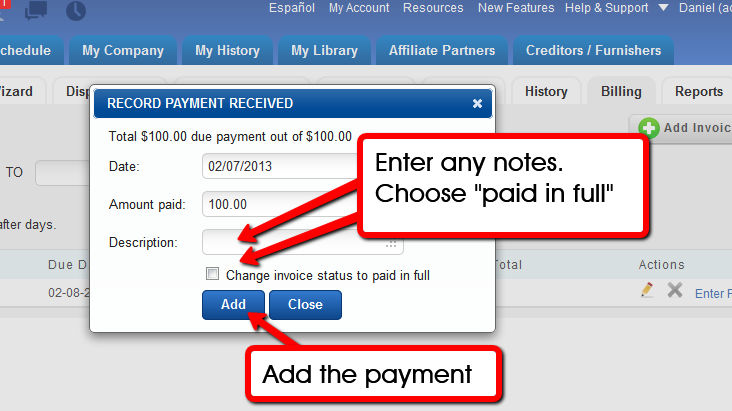
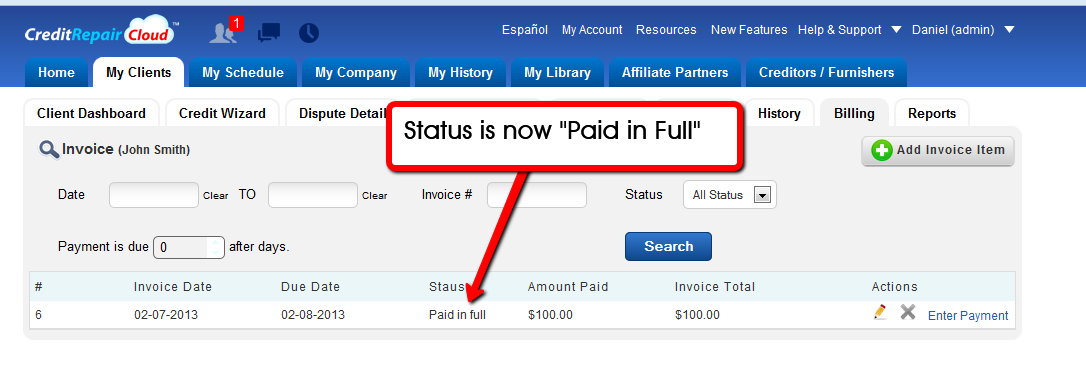
Credit Repair Cloud has simple billing, invoicing and accounting tools that you can access in each client’s dashboard page.
These screenshots will show you how it works.